My Scrapbook Pages

Thursday, August 10, 2006

Baby Book 5 - Black & Whites

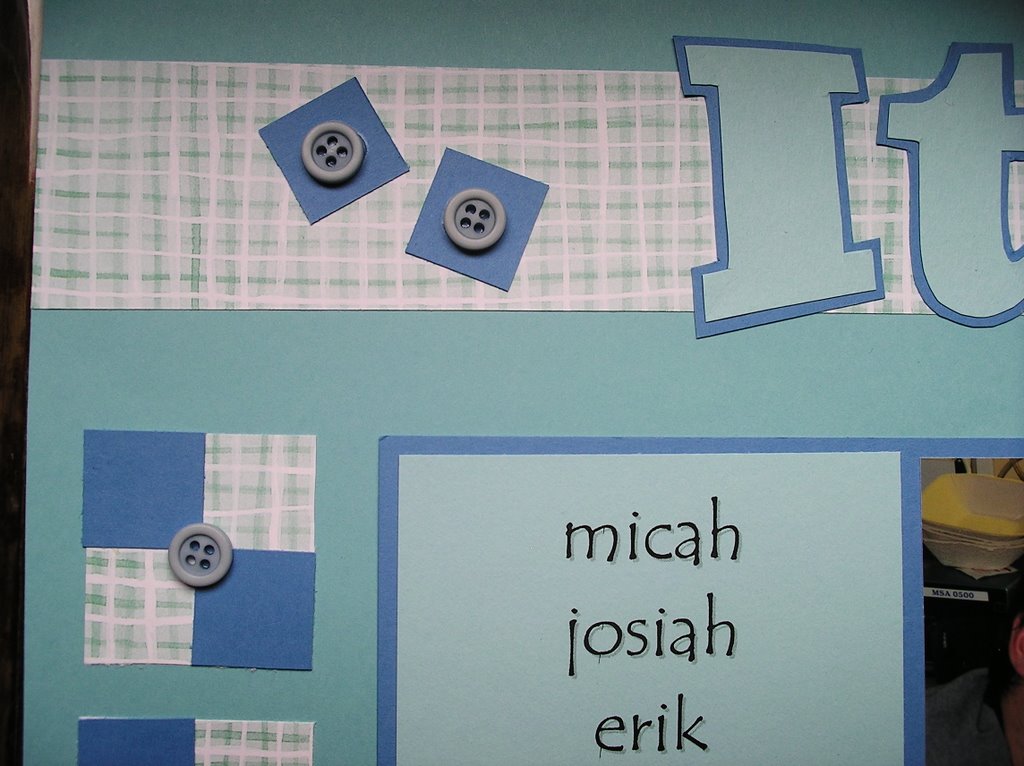
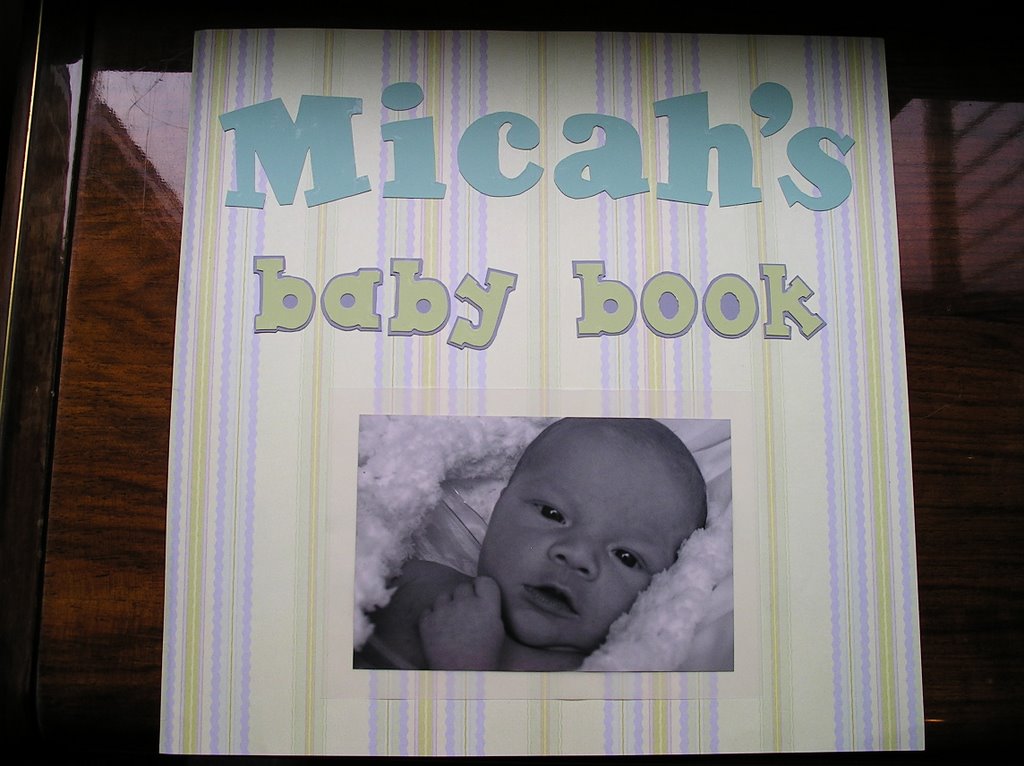
I took several black and white pictures the week after Micah was born because I wanted to make some birth announcements. I just set him up on our bed with white sheets and natural lighting. I was really happy with these pictures and wanted to create a scrapbook page just for them. I cut the letters for "Little" from white cardstock and also from vellum. I layered the vellum behind the white to give the letters a shadow effect. I printed the word "Angel" on the computer and put a vellum layer with silver brads over top to soften it.
The background pages were just a black page and a white page cut diagonally. I got the little embellishment square idea (2nd page) from a scrapbooking magazine.


Thursday, July 20, 2006

Baby Book 4 - Micah's arrival!

I LOVE the way these pages turned out! I don't think there's anything I would change about them. The colours and patterns of the papers all work together perfectly.

I picked some of my favourite pictures from just after Micah's birth while we were still in the hospital. I did the extra (tedious) cutting for the title to create a border around the letters but I love how it turned out. I like that the title spans the whole 2 pages with the plaid paper behind it. On the left page I grouped together a couple of pictures with some journalling on a darker blue paper. I think by grouping these things it really pulls it all together rather than just having several pictures, etc. just floating around on the page. On the right page I had a few different pictures and I mounted all of them on a paper border. I used another little vellum quote and attached it with eyelets. One of my favourite things about this page was that I was able to use the measuring tape they gave me at the hospital. You may not be able to tell, but they marked his length and head circumference on it. I just had to trim it a tiny bit but otherwise it fit perfectly!
Here you can see the embellishments I did with two different kinds of paper and some buttons (just glued on). I mimicked this pattern a few times on the pages to give it some consistency.
The journalling included Micah's birthdate, etc. (top left) and a shortened version of his birth story and hospital experience (bottom right).

Baby Book 3 - Ultrasound Pictures

This isn't my favourite page for some reason, but I can't quite pinpoint why. I've already changed a few things about it and now I think I'll probably just leave it the way it is.


I typed a little write-up on the computer for this page to explain the pictures that I used. I didn't do much journalling at all for our wedding album, but I did quite a bit of it for Micah's baby book. I found that it helps explain the pictures a bit better and people tend to get more out of the book when they look through it. I also used a little poem on a vellum page. You can buy little booklets of quotes (or even 12x12 pages that can be cut up) for all different sorts of occasions. I've also just typed up my own text and sent the vellum through the printer. I love using vellum! It's a little hard to attach to a page though unless you use those little eyelets or brads. This one is just glued to the page but it keeps falling off. The white background page is attached with silver brads and I cut out some little hearts from the same paper I used for the title text.

Baby Book 2 - Pregnancy

Although I'm happy with the way these pages turned out, I'm not proud of these ugly pregnancy pictures and I'm a little embarassed to post them on this blog! Oh well, here goes...


I cut out the words "9 months" and used stickers for "and counting". I tied hemp around the page for a bit of embellishing. (I'd like to find some beads with numbers on them so I could string the numbers 1 through 9 on the hemp, but so far haven't had any luck.) I didn't have room to put a border around each picture so I just placed a longer strip behind the pictures to bring a bit of interest. For the smaller text (labelling the number of weeks I was in each picture) I just printed them on the computer and cut them out.

Baby Book 1 - Title Page

Now, I can get started posting Micah's 1st-year baby book!! This is a project that, overall, I am much more pleased with. I started this 2 years ago (shortly before he was born) and just finished it a couple of weeks ago. I have MANY more pictures that I could scrapbook, but I decided to limit myself to some favourite pics and major events of his first year, since I've already got baby #2 on the way and I wanted to set myself a reachable goal. Pretty soon I'll be starting on a new scrapbook for the next little one.
I'll include every page from the baby book since I am generally happy with all of them.

This is the title page for Micah's book. Here's a little secret - I had a bunch of paint chips from Canadian Tire that I was using to decide on my nursery colour-scheme (I had picked this pastel palette since we didn't know if it was going to be a boy or a girl) and I used the paint chips to cut out the letters for the text. I think it would've been nice to put the pop-out squares behind the letters - maybe just for his name or something. I also think the picture needs more of a border around it - right now there's just a piece of white vellum around it (not sure if you can see that in the picture). I may still go back and jazz up this page a little bit.

Tuesday, July 18, 2006

Wedding Book 8

This is the closing page of my wedding scrapbook. I like how it looks like a mish-mash of several things and yet still feels tied together. I used an engagement photo (top left - actually a "re-enactment" photo) and also a self-portrait (bottom right) that we took on our way to our hotel on our wedding night. The Love Chapter (top right) was from a home-made card that someone had given us and the cool yarn was something I had lying around from a different craft. I used stickers for the text.

Sunday, July 16, 2006

Wedding Book 7

These pages are pretty straight-forward I think. I always struggle with deciding on the colour theme for each page, so for this one I had 2 12x12 pages - one tan and one burgundy. I just cut a border around each page and then switched them and suddenly I had matching pages! By using more of those same colours on the page, it tied everything together. The only thing I don't love is that there still seems to be a lot of empty spaces on the page that are just asking to be embellished :)

I always see these cute little gift tags for sale at Michael's or wherever but I figured I would just make them myself. I just hand-drew a stencil so that they would all be the same size, punched a hole in the end and looped some raffia through.

Saturday, July 15, 2006

Wedding Book 6


I like these pages mostly because of how I layered the papers. I had a few different green papers (including a vellum page with green flowers) so by cutting and layering them, it made the page much more interesting than just using one background page. And it makes the pages look good without having to add a ton of embellishments on them.

I did a layering effect on the letters for "bride" and "groom", using a bit of green flowered paper I had left over from another project.

This was a simple embellishment - just squares of patterned paper on top of squares of tan paper.

Wedding Book 5


I finally got some new stencils when I did this page! I love this big bold lettering - much bigger than the other stencils I had. This page is actually very simple but I like it for some reason. I like the series of 3 smaller pictures on the first page next to the larger one and I also like how I have a border around every picture. It's a nice finish. I think my little embellishments added a lot, too.

A close-up of the hemp & beads I added on the front. I had this in a bracelet-making kit that I was never going to use. I tied knots to keep the beads in place and pulled the hemp strings around the back of the page where I just taped them on.

This was a simple little detail - cut-out squares in alternating colours.

Wedding Book 4


These two pages are fun. I used our wedding colours again (the lilac and the sage) to bring out the colours in the pictures. By putting some white paper and printed vellum pieces in random places on the page, it gave the whole spread a bit more personality. I think it would've still been nice to have a small border around each individual picture just to finish it off a bit better. You'll notice I used the same font for my lettering - I didn't have a lot of stencils at this point!

The pictures I'm using to scrapbook are all candid shots that other people took and had given to me. For some of them, I went and got colour photocopies since I didn't want to cut them all up. Remember, this was still 5 years ago - in the age before digital cameras!

Friday, July 14, 2006

Wedding Book 3

This is just half of a 2-pg spread I did for our vows.


The vows were printed on the computer and I mounted that page along with a picture inside a framed box. By cutting out a border around the whole box (and also around the picture), it added some more detail to the picture. I'm not so happy with the way the "J" turned out at the top. I got the idea from a magazine and tried to re-create it but I didn't have the proper mounting foam square thingys (whatever they're called...) The idea was to have little punched out flowers inside the letter that were "floating" around. Hard to explain, but maybe I'll go back and redo it someday. The opposite page was pretty much the same except with purple paper and green lettering.

Wedding Book 2

Here's another page I was happy with. I did a 2-pg spread all about the music we had for the ceremony.


For the song lyrics, I just typed up the words on my computer with a fun font and printed it out on some cool paper. You can stick any paper in your printer (at least I can in mine). Vellum, cardstock or even this stuff which was really thick. I also really like the little embellishment squares I did. I just ripped some musical notes from the background paper (probably stolen from behind one of the pictures) and layered them on two different papers. (I think the easiest way to make a scrapbook look more interesting and more professional is to layer papers.) I also layered the letters. I actually cut them out on white paper, glued them onto a brown page and cut them out AGAIN leaving a little border. Very tedious - yes - but I love the way it turned out and I think it makes the letters pop. I save those time-consuming cutting jobs for when I'm sitting in front of the TV...

Wedding Book 1

The first "real" scrapbook that I put together was of our wedding (5 years ago already!). I don't love all of the pages in it, but I've selected some of the ones I was particularly happy with. This is the very first page in the book.


I'll admit to being a little perfectionistic in my scrapbooking and I actually will spend the time tracing and cutting out each letter from a stencil - just because I think it looks so much better than just stickers or whatever. I think you can buy letter punches but they are EXPENSIVE! So, I'll stick with my old-fashioned method of scissors. I think putting the white blocks behind each letter was a nice addition and I also really like the ribbon and the button - I think I just used a glue-stick. The little daisies were my own creation cut from bits of paper and very tedious to glue on nicely, but they turned out very cute. "The Two Shall Become One" was from a wedding card we received. All in all I was happy with this as a "title" page for my book.

(By the way, if you click on the picture it should give you a more enlarged view)

Disclaimer

For those of you who might stumble across this blog and wonder what it's all about, a couple different people asked me to post some of the pages from my scrapbook. Not that I'm a scrapbooking expert by any means - in fact I don't really have all the "right" tools but I think I use my creativity & limited resources to make my pages look pretty good. Anyway, hope you enjoy!